A basement can be an incredible space in a house for everything from cozy living areas to practical storage. However, an uneven or cracked concrete floor can severely limit this potential, creating unusable zones, posing safety hazards, and even hinting at underlying structural concerns.
Don’t worry, restoring a level and stable basement floor is achievable with the right knowledge and approach. We’ll provide a roadmap for you to reclaim your basement’s functionality.
Let’s see what the common culprits behind these issues are, and some concrete leveling effective methods to level an uneven basement floor.
Common Causes Behind an Uneven Basement Floor
Sloping floors, cracks in the slab, and persistent water pooling are all indicators that it’s time for basement floor repair. Understanding the root cause can help you tackle the problems effectively. Let’s take a look at some key reasons for an uneven basement floor:
1. Foundation Settlement
Foundation settlement happens when the soil beneath your home shifts and compacts over time. Uneven settlement exerts stress on the foundation, leading to cracks in walls and the floor. It also causes sticking in doors and windows, and a general loss of structural integrity in different parts of the house.
This issue is often caused by expansive clay soils. These soils have a high clay mineral content (like montmorillonite) that causes them to swell when they absorb water and shrink considerably when they dry out. This cycle of expansion and contraction causes unsettling changes over time.
2. Excess Water
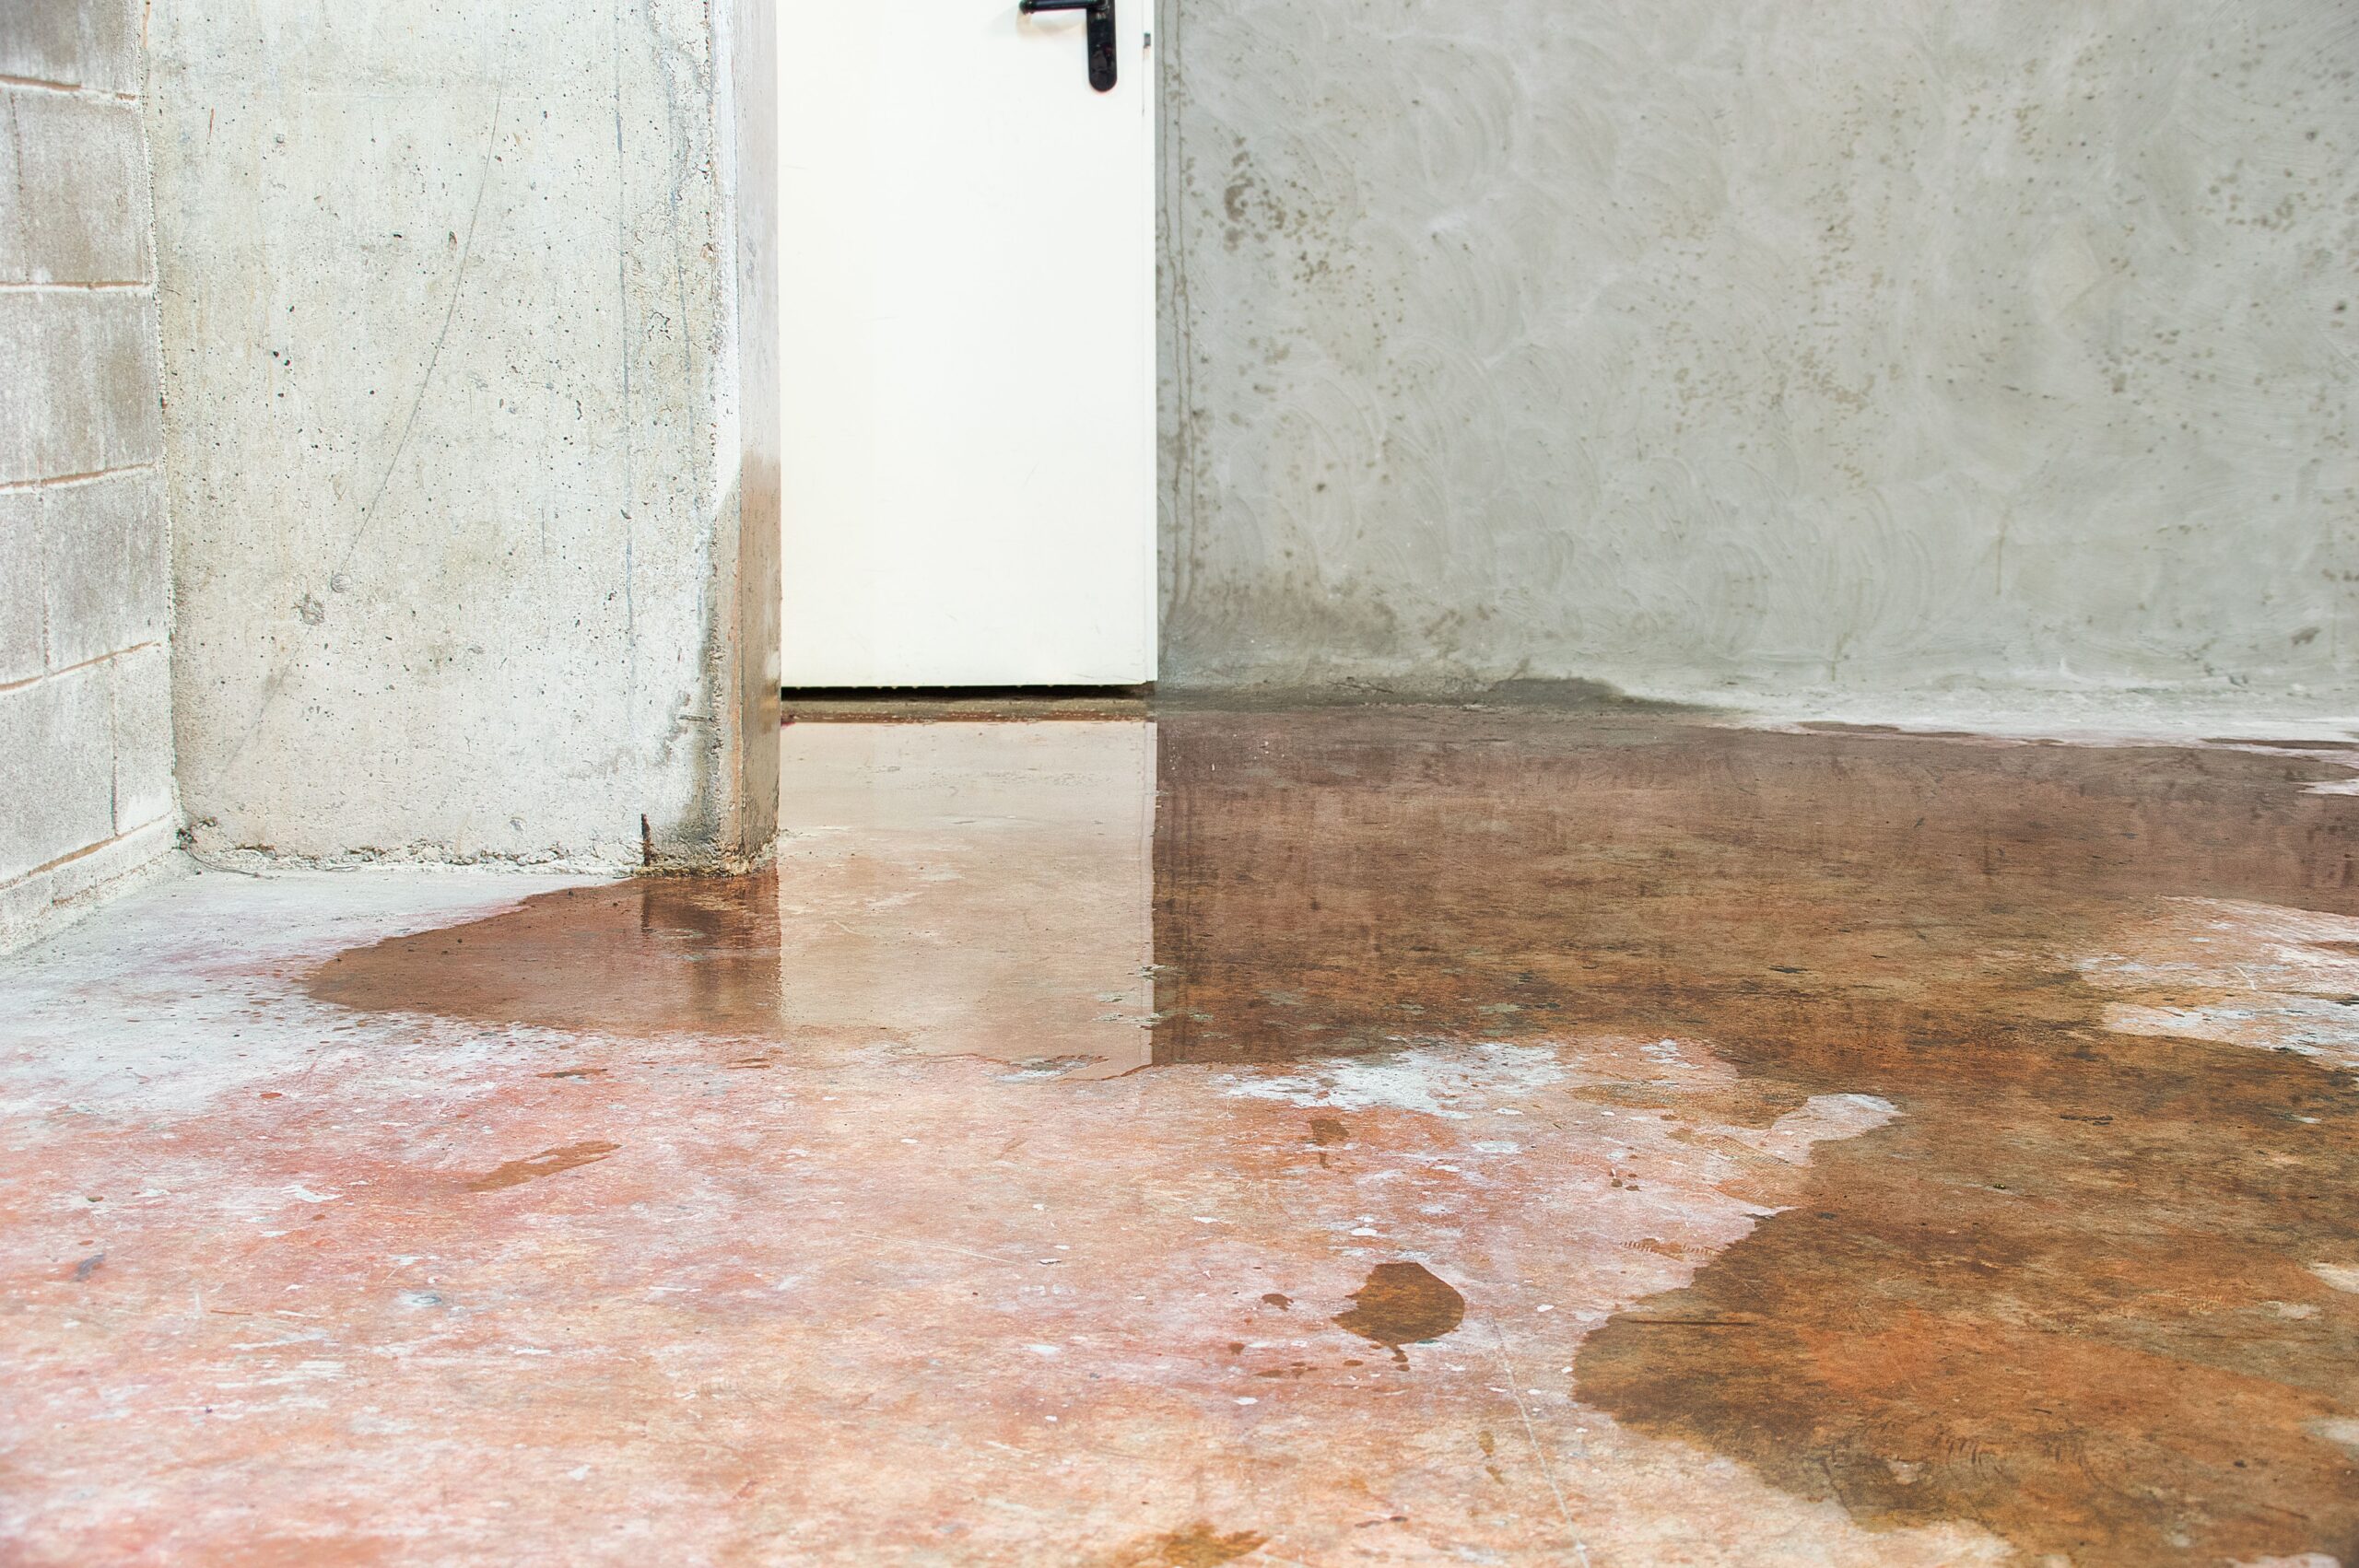
Excess water around your foundation can also interfere with the concrete floor leveling. Poor drainage or excessive moisture saturates the soil beneath the slab and causes it to shift and settle unevenly. Prolonged exposure to this dampness can also warp structural components and weaken the concrete over time.
3. Foundation Cracks
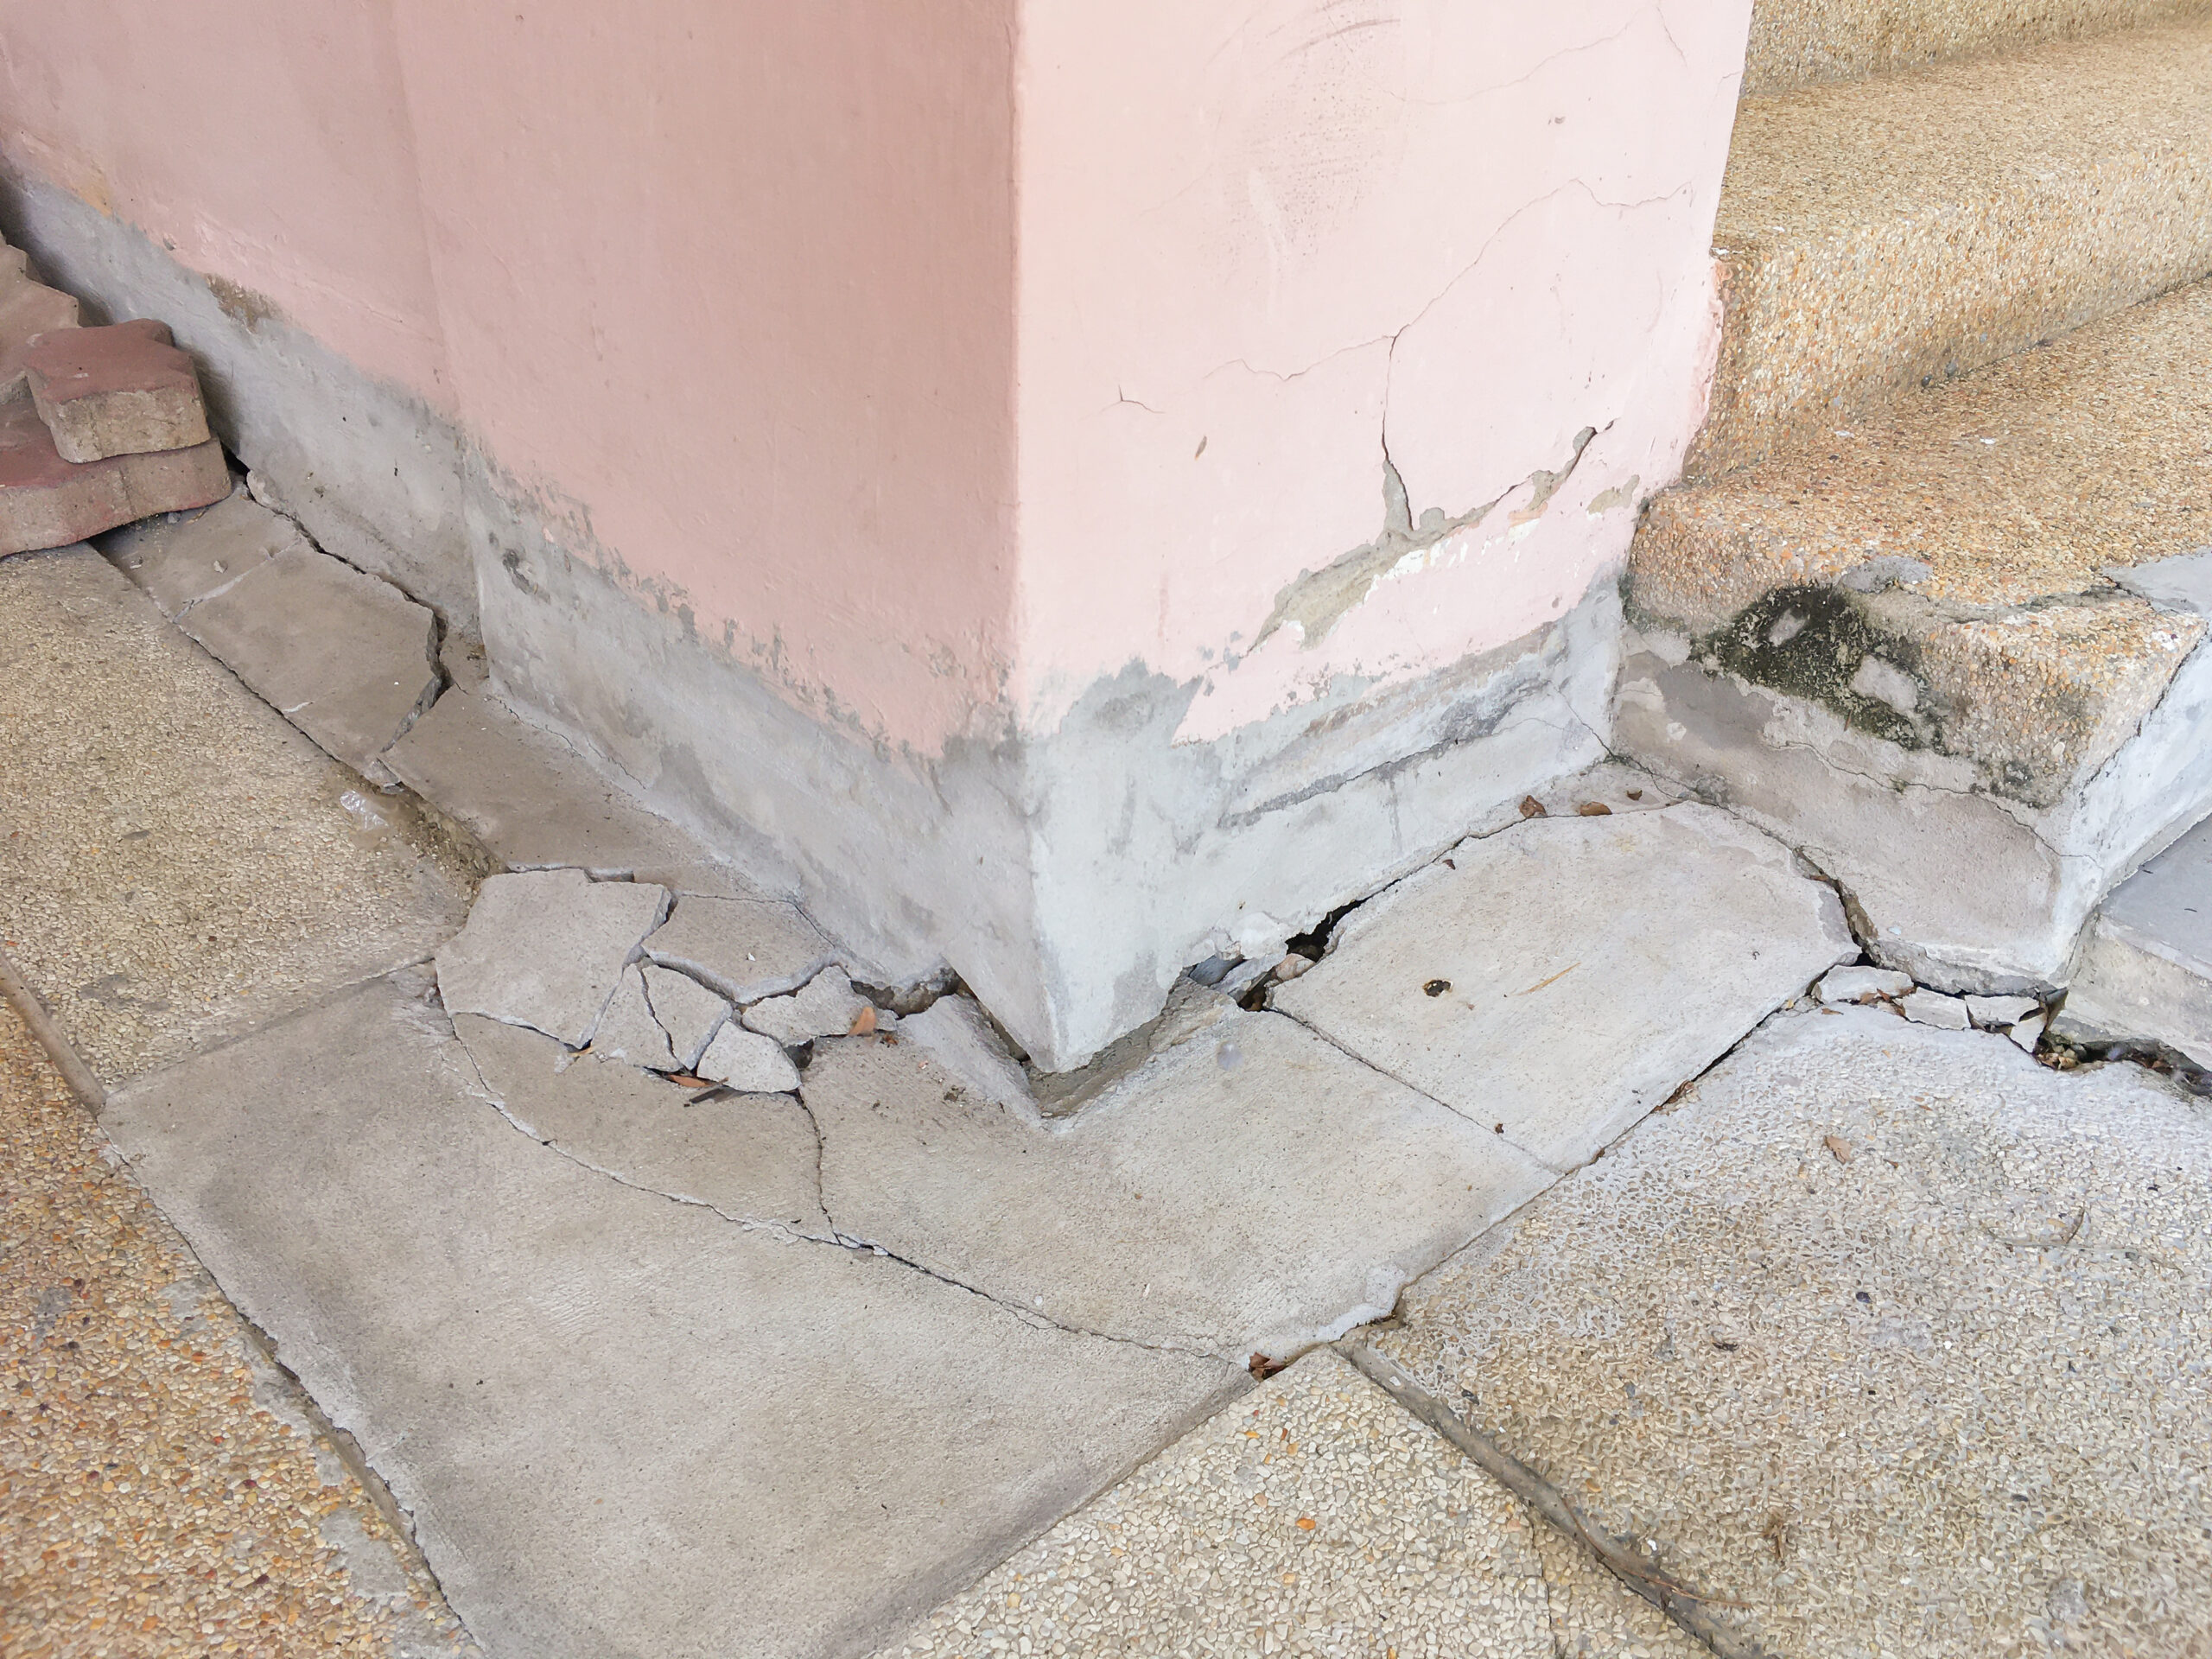
Foundation settlement exerts stress on the rigid concrete basement floor, causing cracks. As different parts of the foundation settle at varying rates, these initial cracks widen and lengthen. This expansion eventually leads to an uneven basement floor.
Instead of focusing solely on quick basement floor crack repair, it’s crucial to investigate and address the underlying foundation settlement issues. This will help you prevent further cracking and keep the floor levels stable.
3 Different Methods and Techniques to Level an Uneven Basement Floor
US Census data highlights that nearly 6 million US homes experience structural damage. Among these, the most common problems are visible cracks in walls, uneven floors, and sticking doors and windows. Let’s explore some tried and tested methods to level an uneven basement floor.
Method #1: Self-Leveling Concrete Compound
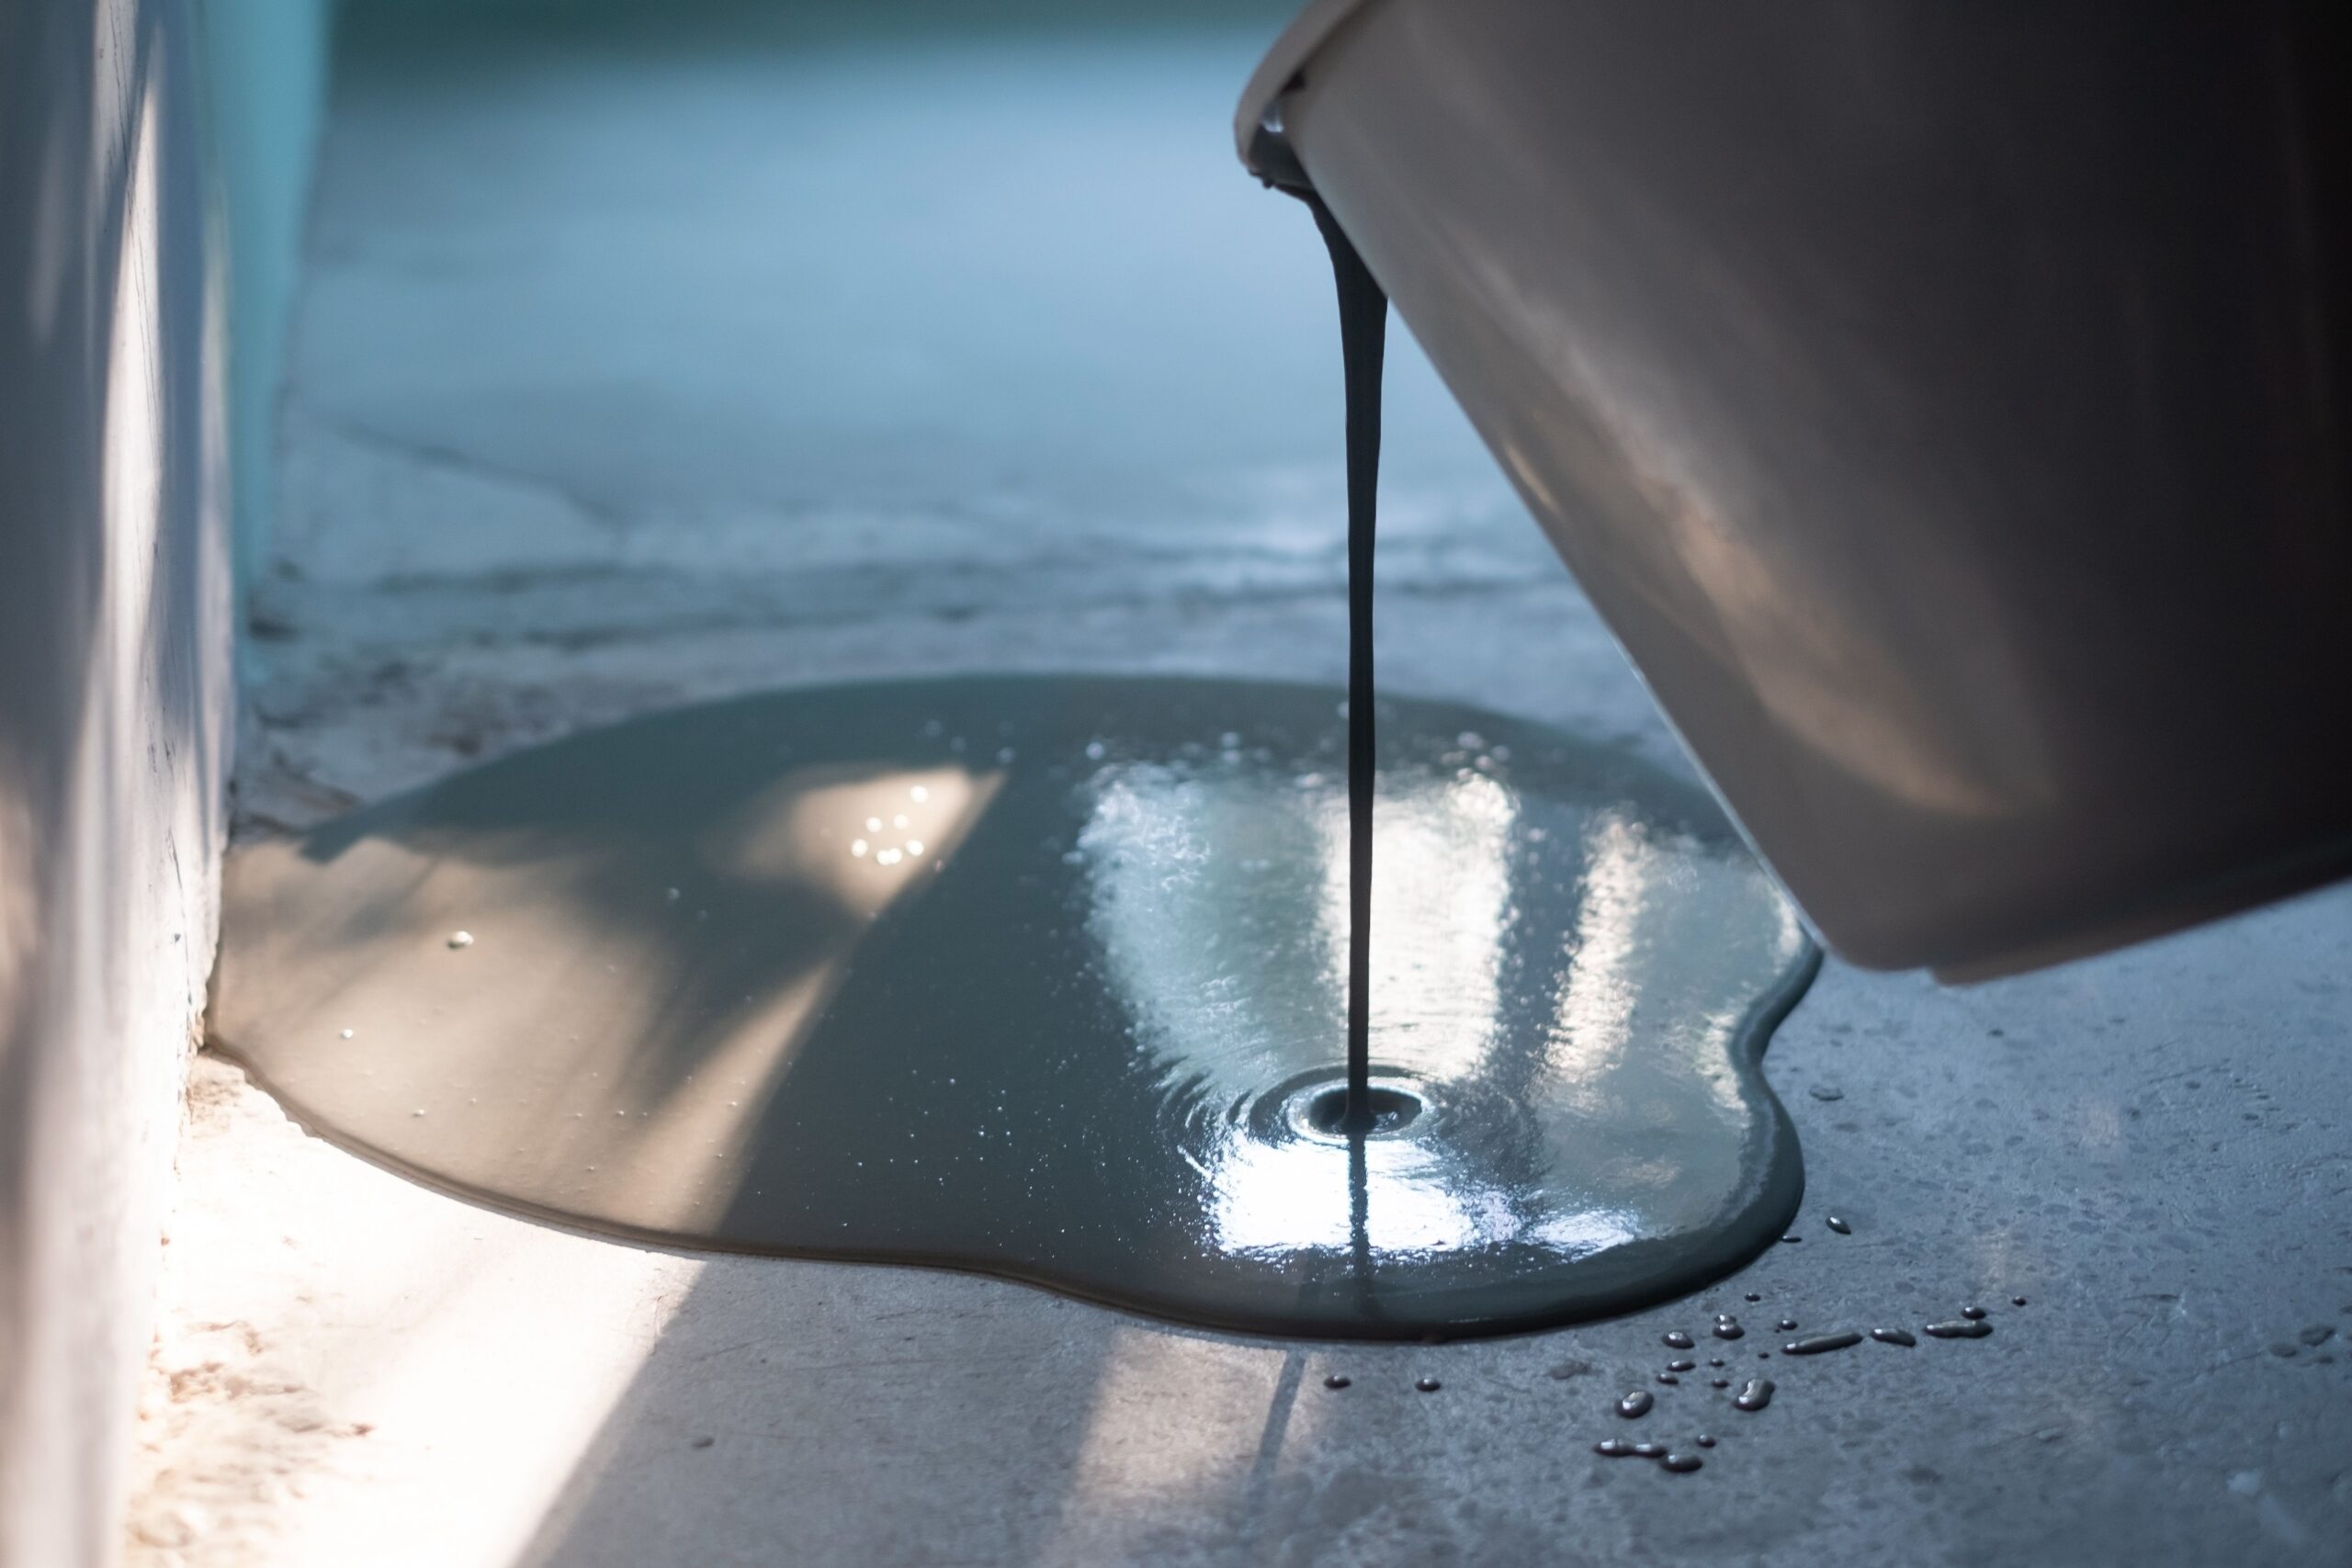
Self-leveling concrete compounds are liquid, flowable mixtures that effortlessly spread and then harden to create a uniformly level surface. There are different types of compounds available including gypsum, hybrid formulas, and Portland cement.
Portland cement-based products are considered best for concrete leveling due to their inherent resistance to moisture. Self-leveling is a DIY method to level an uneven basement floor that you can do at home. Here is a step-by-step method for the self-leveling process:
Step #1: Initial Assessment
The first step to level an uneven basement floor is a comprehensive assessment. This involves identifying all uneven areas and determining the degree of their deviation from a level plane.
Professionals often use specialized tools like laser levels for accurate assessment. These tools project a precise horizontal line across the space, and long straightedges, which reveal dips and rises on the floor surface.
A correct measurement of the floor’s irregularities helps with the amount of leveling compound needed for the project.
Step #2: Floor Cleaning and Preparation
The next step is to thoroughly clean and prepare your basement floor. Start by removing all obstructions, including furniture, stored items, and any loose debris.
Next, sweep and vacuum the entire floor surface to eliminate dust, dirt, and any other contaminants that could affect the bonding of the leveling compound.
Once clean, revisit the low spots identified during the initial assessment and clearly mark them.
If the depression is ½ inch in depth, it is advisable to first apply a concrete patching compound. This will fill the deeper areas and reduce the volume of the more expensive self-leveling compound required.
Step #3: Priming
The next step in leveling an uneven concrete slab is the application of a primer designed for self-leveling underlayments. This primer acts as a bonding agent between the existing concrete and the new leveling compound and enhances adhesion.
Step #4: Preparing the Mixture
Choose an appropriate leveling compound and adhere to the manufacturer’s instructions regarding the accurate water-to-powder ratio. Pour the specified amount of water into a clean, sturdy mixing bucket, and then gradually add the self-leveling powder.
Mix it with a mixing paddle, typically 2 to 3 minutes, until the mixture achieves a smooth, lump-free consistency.
Step #5: Pouring and Spreading
Start pouring the mixed leveling compound on the primed floor and allow it to flow naturally. Use a gauge rake to gently guide the compound towards corners and edges. Don’t overwork it, as this can trap air.
Step #6: Curing and Finishing
Once the self-leveling compound has been poured and de-aired, it’s critical to protect it during the curing process. Prevent foot traffic and drafts in the area at least for 24 to 72 hours. Avoid placing any objects on the leveled floor until they are fully cured.
Method #2: Concrete Grinding
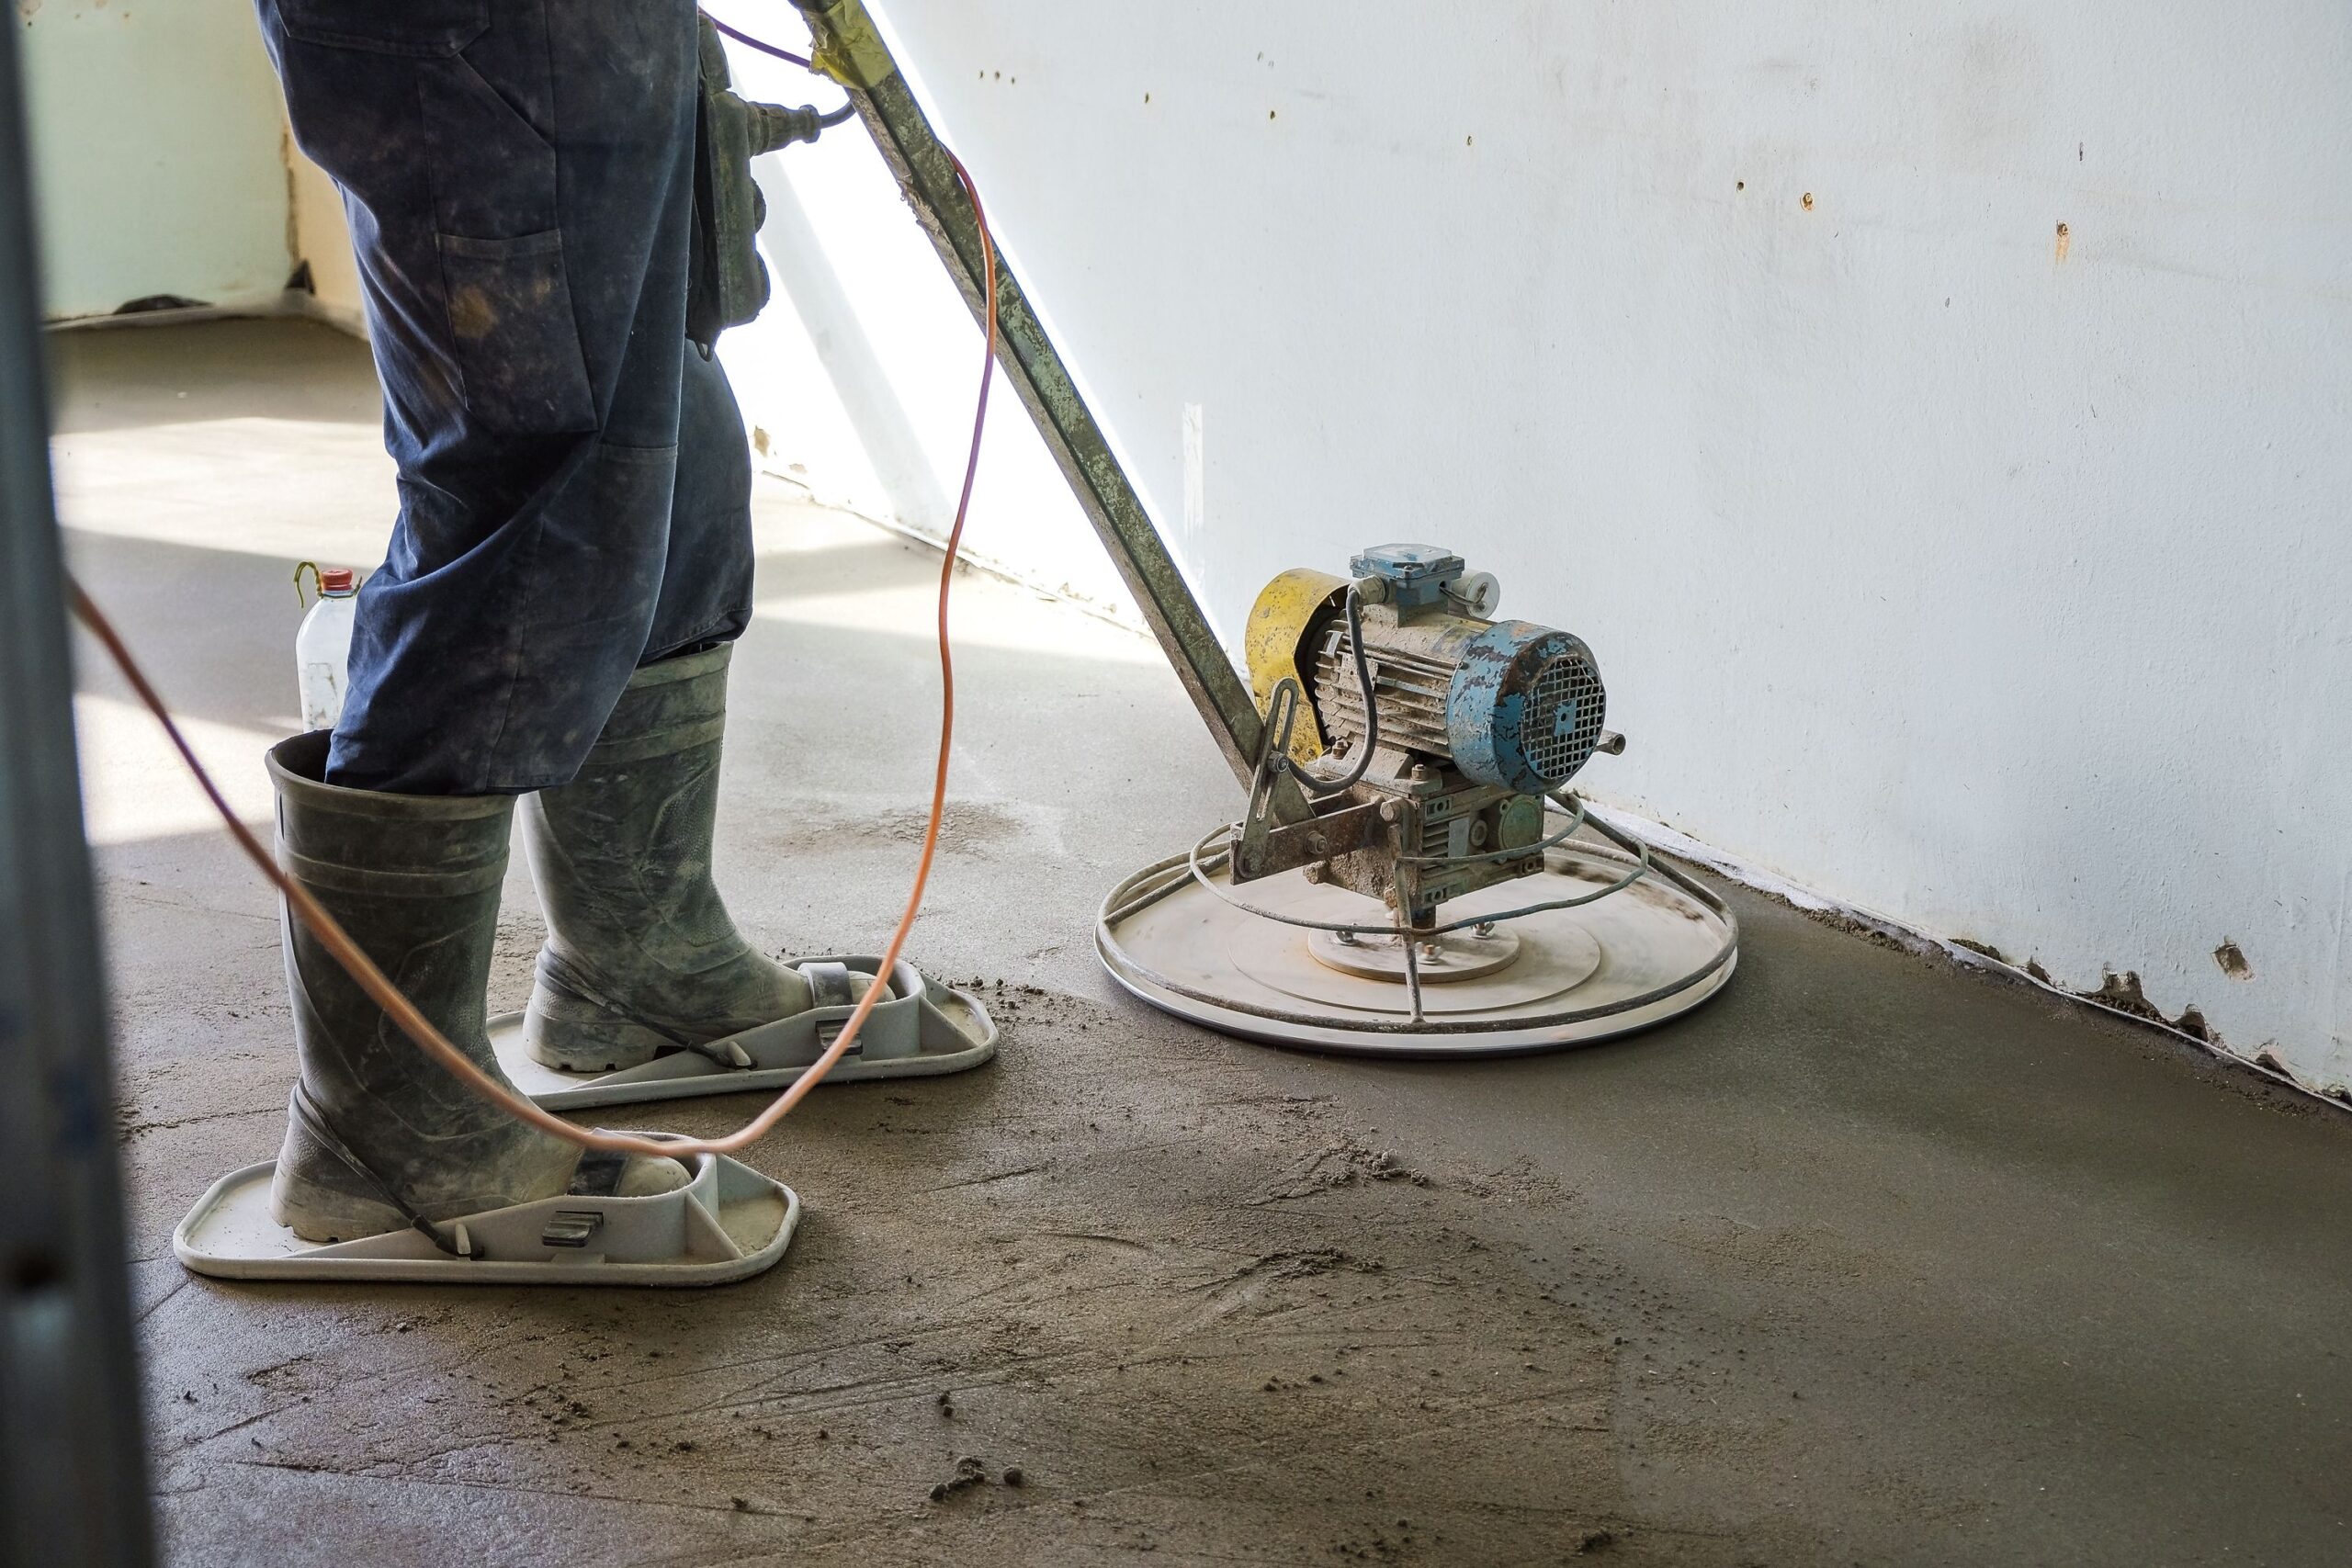
Concrete grinding is another effective approach to level an uneven basement floor by physically removing high spots and ridges in the existing concrete surface.
Let’s see how the process unfolds:
How Does the Concrete Grinding Process Work?
This method utilizes specialized concrete grinders equipped with diamond grinding wheels or discs. The process begins with a thorough cleaning of the floor to remove any debris, followed by the identification of uneven areas.
The concrete grinder systematically moves over these high spots and then grinds them down until they are level with the surrounding concrete. It is advisable to use walk-behind grinders for larger areas, whereas handheld grinders are suitable for smaller, more localized high spots or edges.
Remember to use proper dust control measures during basement slab leveling, as the process generates a huge amount of dust. You might need to make several attempts with grinders to get a really smooth and even floor.
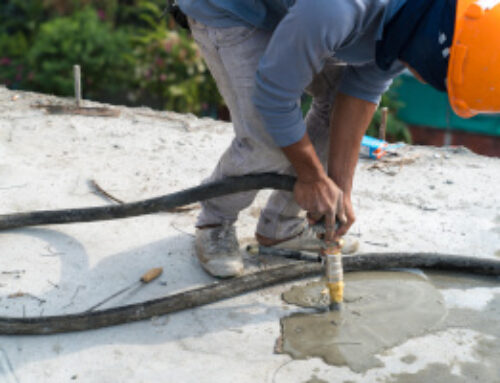
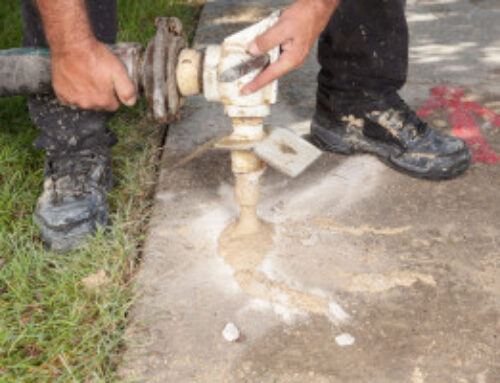
Method #3: Mudjacking (Concrete Lifting)
Mudjacking or slabjacking is a professional concrete leveling technique designed to raise a sunken basement floor to its original position. Foundation repair specialists employ this method by injecting a specialized slurry mixture under the settled concrete slab.
This process aims to restore the floor to an even plane, addressing issues caused by soil settlement. Here’s a simplified process of mudjacking the basement floor:
Step #1: Drill Mudjacking Holes in the Concrete Slab
The first step involves drilling a series of holes, typically 2 inches, throughout the basement floor slab. The number and placement of these holes depend on the size and extent of the settlement.
Step #2: Pump Mudjacking Slurry Through the Holes
A specialized mixture of sand, soil, cement, and water is pumped through the drilled holes. This mixture is injected at a controlled high pressure, which hydraulically lifts the settled concrete back to its desired level position.
Step #3: Fill the Mudjacking Holes and Cracks
Once the basement floor has been successfully lifted, the drilled injection holes are filled with concrete patching material. It’s a final step that provides a more uniform and finished appearance.
While mudjacking is an effective method, it’s important to acknowledge that it comes with a set of pros and cons. It is a cost-effective solution with relatively minimal disruption to the surrounding structure.
However, the injected slurry requires a longer drying or curing time compared to some other leveling techniques.
Additionally, the larger injection holes can be more noticeable after patching, and the added weight of the slurry might be a concern in certain soil conditions.
Tips and Precautions to Safely Level an Uneven Basement Floor
Here are a few tips and tricks for you to safely level an uneven basement floor:
- Personal Protective Equipment PPE: Always wear appropriate safety gear throughout the leveling process. This includes a respirator or dust mask (N95 or higher) to protect against dust inhalation, safety glasses or goggles to prevent eye irritation, and gloves (nitrile or rubber) to protect your skin from any chemical reactions.
- Adequate Ventilation: When working with the concrete leveling compounds, make sure there is good ventilation in your basement. Open windows and use fans to circulate fresh air and remove dust and fumes.
- Practice Safe Lifting Techniques: Bags of concrete leveling compounds can be too heavy. Keep your back straight while lifting them and do not twist. If it is too heavy to move on your own, ask for assistance to handle it.
- Implement Preventive Maintenance: To prevent any future unevenness, pay attention to concrete preventive maintenance. Your drainage system should be fully functioning to minimize water accumulation in the soil. Maintaining consistent humidity levels in your basement can also help reduce stress on the concrete.
FAQs
Expert Basement Floor Leveling: Contact Crossroads Foundation Repair
Dealing with an uneven basement floor can be quite challenging, impacting everything from aesthetics to functionality. Understanding the underlying causes, from foundation settlement to excess moisture, is the first crucial step toward a lasting solution.
You can choose to opt between the DIY-friendly approach of self-leveling concrete or the professional power of concrete grinding or mudjacking. The key is to address the issue thoroughly and safely, and take necessary precautions during the process.
If you are dealing with persistent uneven basement floors and suspect foundation issues, don’t wait for the problem to worsen.
Contact Crossroads Foundation Repair for concrete leveling services to resolve the root cause immediately.